How to Make an Ecommerce Website with WordPress
For commerce, systems are not all that hard to create nowadays. If you have access to WordPress there is no need to hire expensive web design companies.
WordPress can be great for eCommerce websites. It’s a powerful, scalable platform, and best of all, it’s free!
If you’re sticking with WordPress, then great – let’s get down to how you go about building an e-commerce site. Even if you’ve already installed WordPress, stick with us for the first three sections.
Here are the 8 steps to launching your e-commerce website with WordPress:
Table of Contents
Step1: Find your domain name
A domain name is the address of your website. The domain name should be short, simple, easy to remember and easy to spell. Before buying a domain name, make sure that it is not already taken by someone else and that you are allowed to buy it.
You can buy a domain name from sites like Hostinger.
Tips: 15 Best Tips Before Buying a Domain Name
Did you know that .com is the most popular domain extension?
It’s the best option for businesses who want to sell globally, whereas country-specific extensions (e.g. .us) risk limiting their potential customer base.
Before moving on to the next step, make sure you’ve completed each of the following:
- Find a memorable and relevant domain name for your website.
- Checked it’s available
- Set a reminder to renew it next year, after you have purchased it.
How Can I Get a Free .com Domain?
You only need to register for any of the web hosting plans that offer a free domain name. However, make sure the value is enough for you to buy the .com top-level domains (TLD).
For example, if you sign up for Hostinger’s Premium or Business shared hosting plans, you will get a free domain for one year with the value equivalent of a .com top-level domains (TLD)
Step2: Sign up to a hosting provider
If you build a website and want to host it so that other people can see it, you must sign up with a hosting provider.
Before you go ahead and register for a hosting plan and register for one of their packages, take the time to do your due diligence research about them.
- How Much is the Renewal Fee?
- What E-Commerce Features Are Available?
- What Support is Available?
- What is Your Backup Schedule?
- How Strong is Your Security and Do You Offer SSL?
- Does the Hosting Site Own the Infrastructure or are they a Reseller?
- What’s Your Uptime?
- How Scalable is Your Service?
- Are There Any Hidden Fees?
Tips: 9 Questions You Need to Ask Before You Choose a Web Hosting Company
These are all important questions to answer before signing up for any kind of service on behalf of your business or organization
Once you’ve chosen a hosting provider, it’s time to select the most suitable plan for your WordPress site. In general, hosting providers offer a variety of hosting types, such as:
Shared hosting. An entry-level type of hosting that stores different websites on the same server, sharing its resources. Hostinger’s shared hosting plans start at $1.39/month.
Cloud hosting. A premium type of hosting that offers dedicated resources from a network of multiple servers. It’s as simple to use as shared hosting. Hostinger’s lineup of cloud hosting plans starts at $9.99/month.
Virtual Private Server (VPS) hosting. A type of hosting that gives users root access and dedicated resources. It requires some technical expertise to set up and maintain. Hostinger’s VPS hosting starts at $3.95/month.
WordPress hosting. A type of shared hosting specifically designed for WordPress performance optimization and security. Take a look at the following table for a detailed breakdown of Hostinger’s WordPress hosting plans – from the pricing to allocated hosting server resources:
Hostinger came out on top in our research for the best WordPress hosting.
WordPress might be a little harder to handle and maintain compared to other ecommerce platforms and builder softwares.
And you need to install the software for starters. In addition, you will need to keep an eye out for any updates that are released or for the security of your software.
We recommend Hostinger, because they take care of all the hard parts of WordPress hosting for you. They are reliable and offer a great price, plus the services they provide are something that you can always count on.
If you’re just starting out, shared hosting will be more than enough to begin, grow, and succeed. And if you grow so big that you need new housing, our business hosting solution is the perfect choice for big stores with lots of unique visitors!
Before moving on to the next step, make sure you’ve completed each of the following:
- Think about what kind of web hosting will be right for you.
- Read our guide which highlights the best WordPress hosting providers on the market.
- Signed up to a hosting plan
Step3: Install WordPress
To install WordPress as quickly as possible, look for a web hosting provider that can perform the installation for you. Some hosting providers, including Hostinger, offer a quick and easy installation method using an Auto Installer.
Hostinger WordPress hosting plans, for example, are specifically optimized for WordPress and let you complete the installation in just a few clicks.
Here’s how to use Hostinger’s Auto Installer:
- Log in to your web hosting account and click Hosting on the main menu.

- Choose the domain name for your new WordPress-powered website and click the Manage button to access your hPanel.

- On your hPanel Dashboard, locate the Auto Installer button under the Website section.

Under Auto Installer, choose WordPress and click the Select button. The Auto Installer section, highlighting the “Select” button in the WordPress tab

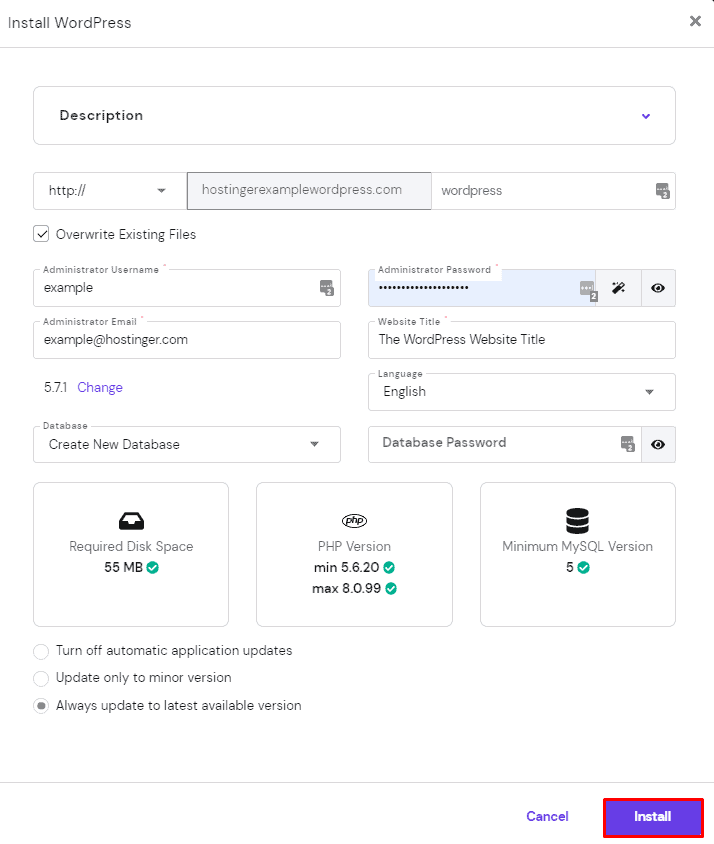
Fill out the Install WordPress form:
- Check your custom domain name and make sure it says “wordpress” next to it.
- The Administrator Username, Password, and Email are for the WordPress login. They do not need to be the same as the web hosting login information. Make sure to choose a strong password to prevent security breaches.
- Create a WordPress Site Title.
- Choose your preferred Language.
- Select the Always update to the latest available version option for automatic updates.
After filling out all necessary information, hit the Install button.
Hostinger will show Installed Applications. Click on the three dots next to your WordPress URL. Select Manage to go to My WordPress Dashboard. The Auto Installer section, highlighting the “Manage” button that appears after clicking on the three dots.

On the WordPress Dashboard, click the “Edit Website” button to access WordPress Administration Dashboard.


Another way to access the WordPress Admin Dashboard is by clicking the Dashboard button under WordPress on hPanel.
IMPORTANT: If you don’t notice any changes on your WordPress site after following these instructions, clear browser cache.
Step4: Install and configure WooCommerce
In this step, we are going to walk you through how to install and configure Woocommerce in WordPress.
Installing and Activating WooCommerce
Before we proceed, make sure to create a website with WordPress first. Since WooCommerce is a free WordPress plugin, it can be installed from the official WordPress plugins directory. The first step is to log into the WordPress admin area.
Next, follow these steps to install the plugin:
- From your WordPress dashboard, select Plugins from the left side menu.
- Press Add New and type WooCommerce in the search bar.
- Find WooCommerce from the search results and click on Install Now.
- Once the installation is complete, click the Activate button.
Setting Up WooCommerce
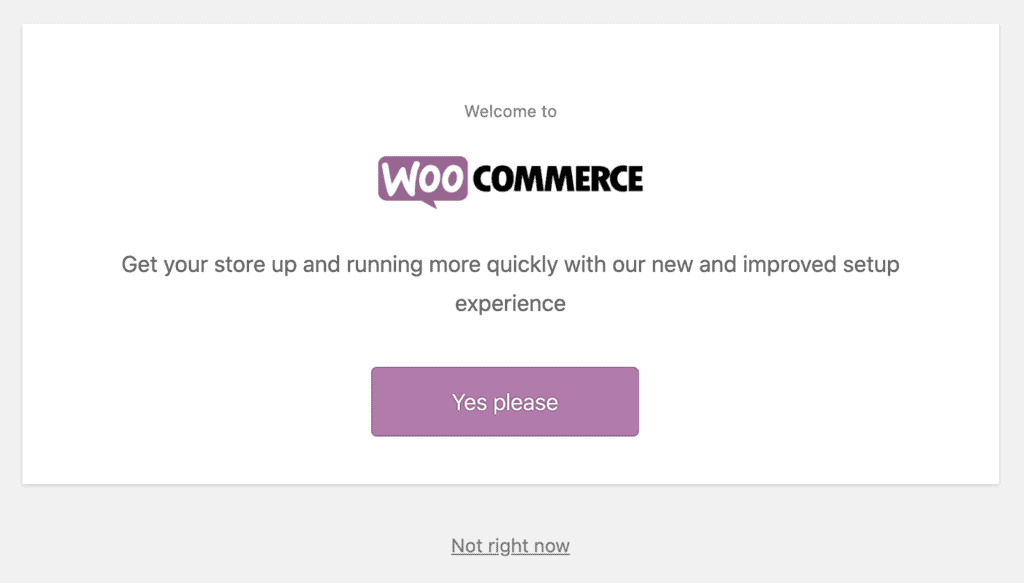 You will then see a WooCommerce welcome message asking to run the Setup Wizard. Press the purple Yes please button to set up the WooCommerce store.
Alternatively, you can also run the wizard from WooCommerce -> Help -> Setup Wizard section.
Follow the WooCommerce tutorial below to set it up:
- Set up the Store Details, including your country, address, and zip code. WooCommerce store details.
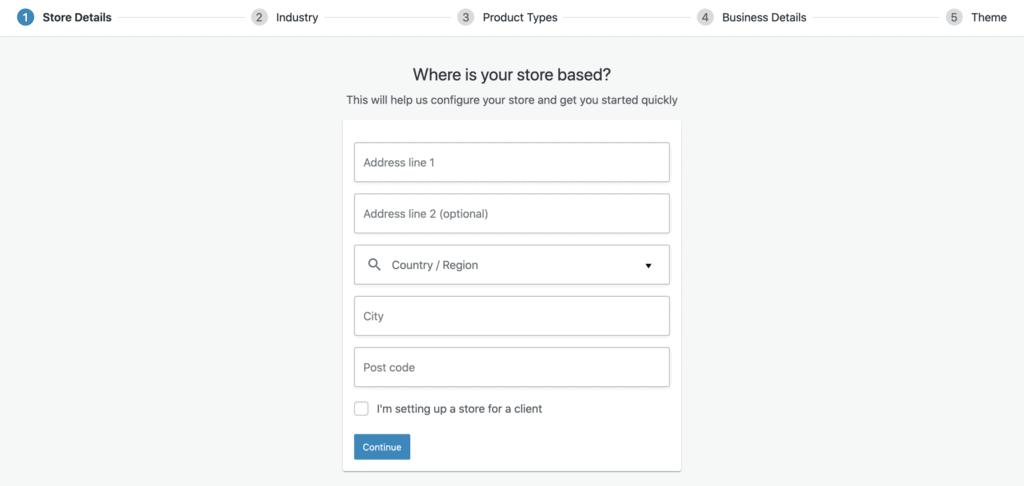
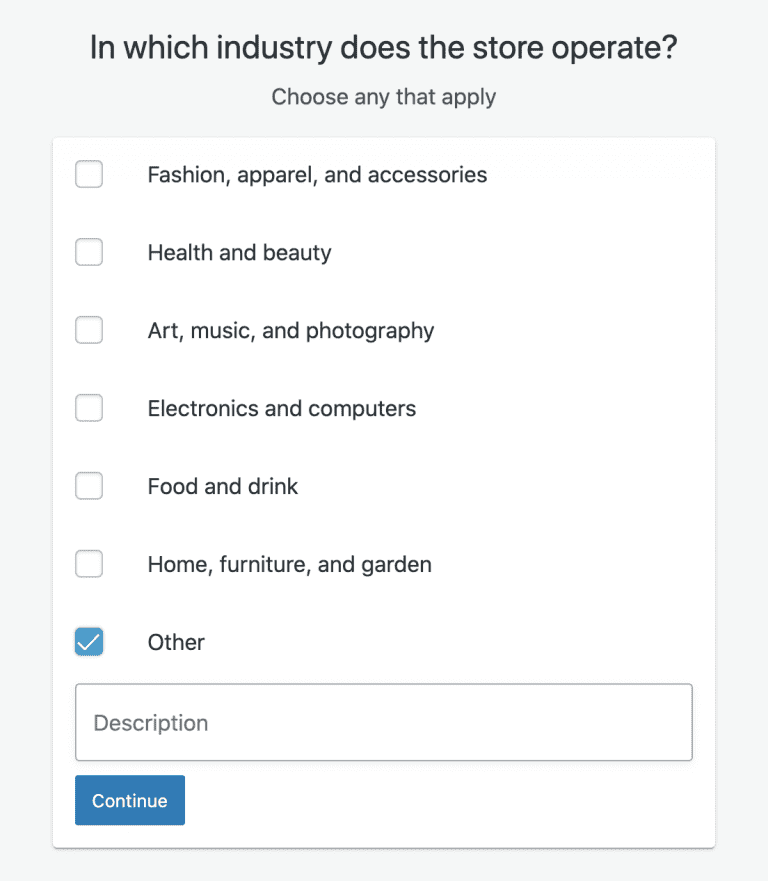
- Move on to the Industry in which your WooCommerce store operates. Make sure to check all the apply. WooCommerce industry set up.
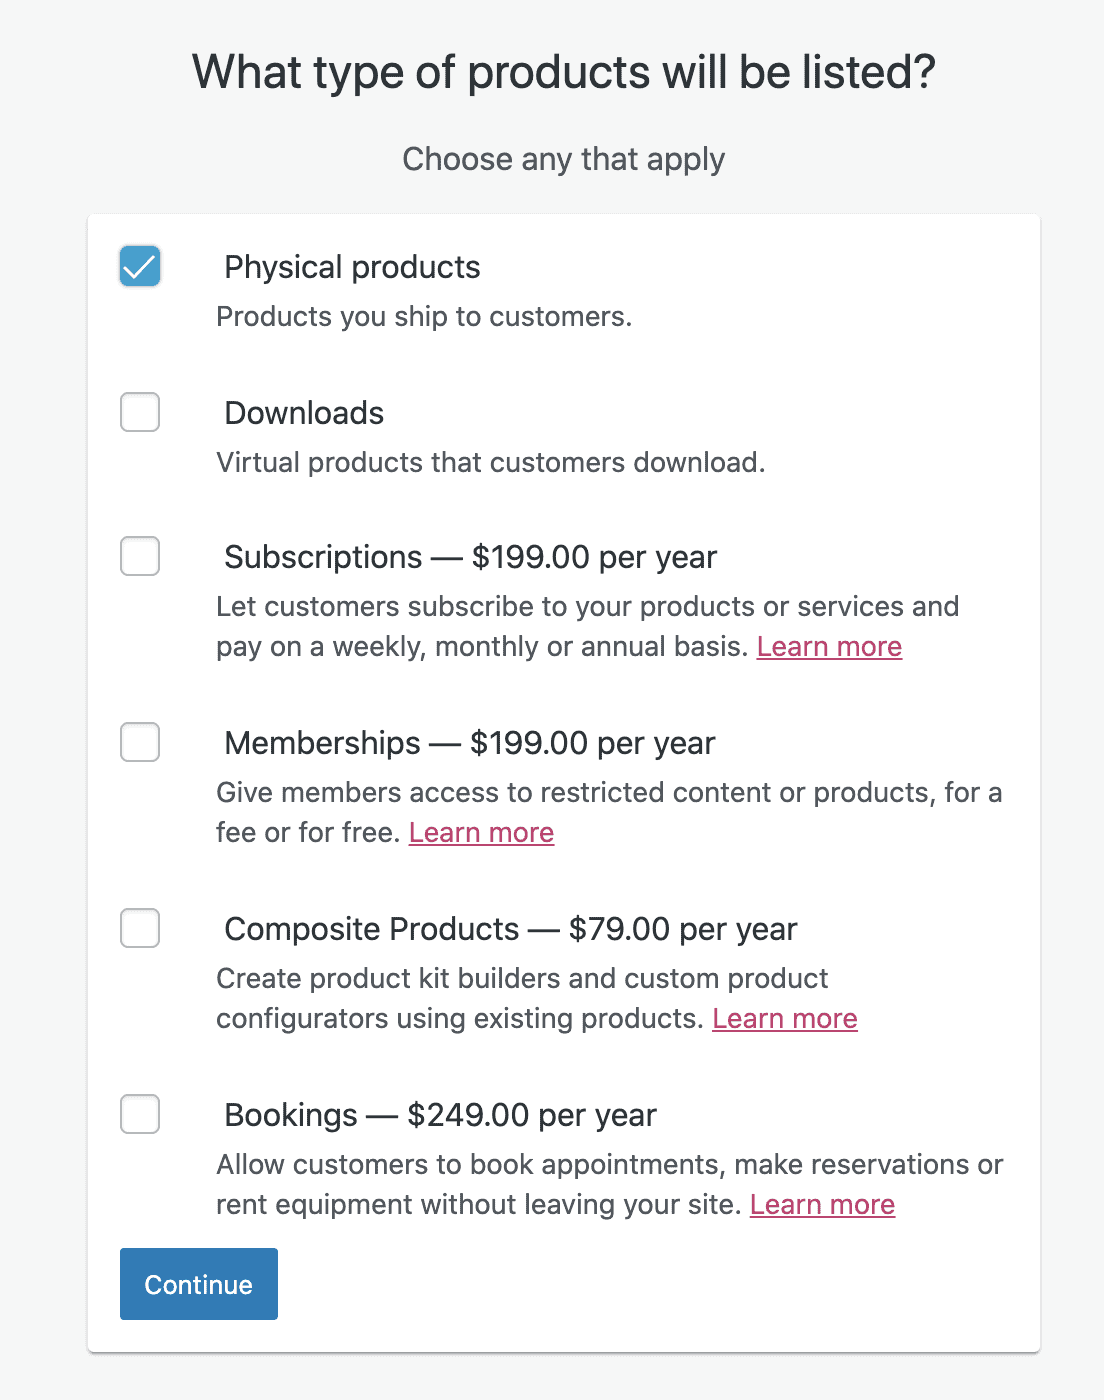
- Then, in Product Types select the type of products that will be listed. And again, make sure to check any that apply. WooCommerce product type.
- Include more Business Details such as, how many products you will display and if you are selling anywhere else.
- For the next step, choose a Theme. These can be from Paid themes or Free themes but don’t worry, it can be changed later.
- You will then be prompted to enhance your store with Jetpack. It’s necessary if you want to enable automated sales taxes and payment gateways. Jetpack also gives additional benefits such as better security, improved speed, store monitoring, product promotion, and management of your store from your phone. Click Yes please! to proceed.
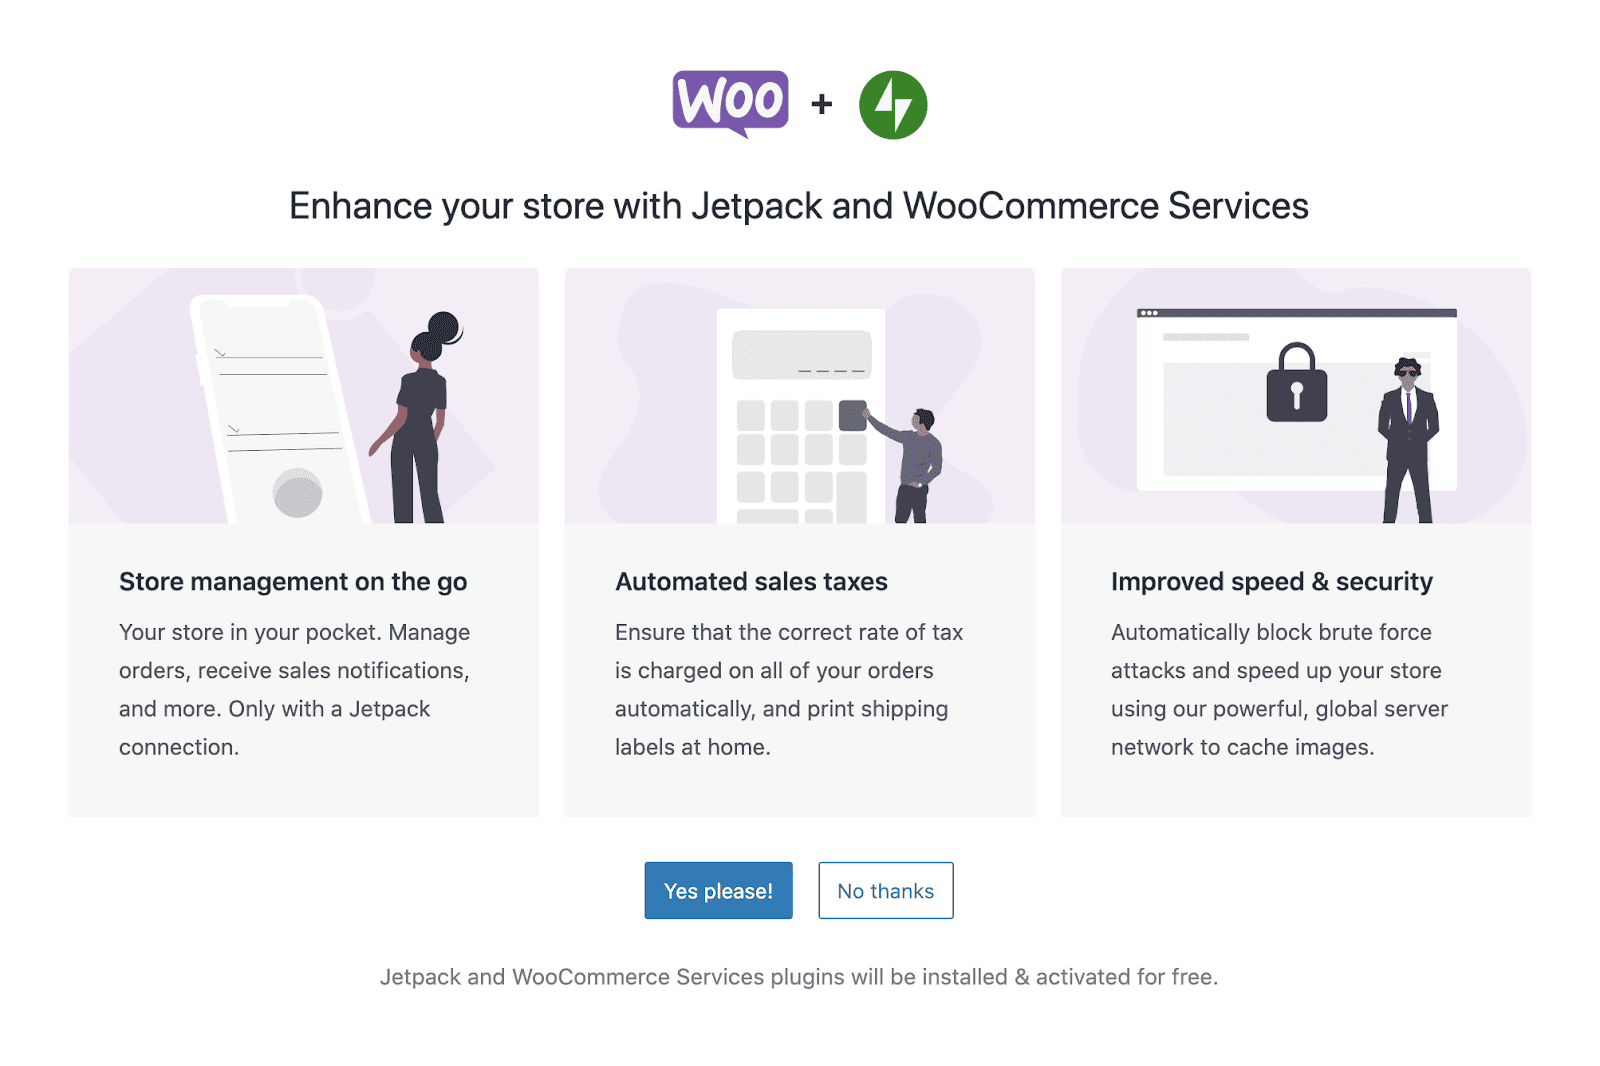
- Create a Jetpack account by entering your email address, username, and password. Or, you can make use of the one-click registration through your Google or Facebook account. Creating a new account will direct you to the Jetpack interface while signing in will move you to the final part of the setup process.
- The next step will redirect you to your WooCommerce dashboard. Here you will see Finish setup, Stats overview, Inbox, and more.
- In the Finish setup area, you can click and complete the following: Add my products, Personalize my store, Set up shipping, Set up tax, and Set up Payments.
- Select Add my products to add your first product. It will give you the option to Add manually, Import larger CSV files, or Migrate your store from another location. Then follow the steps in the next section.

- Then, Personalize your store by creating a custom homepage, uploading a logo, or changing the settings on a store notice.
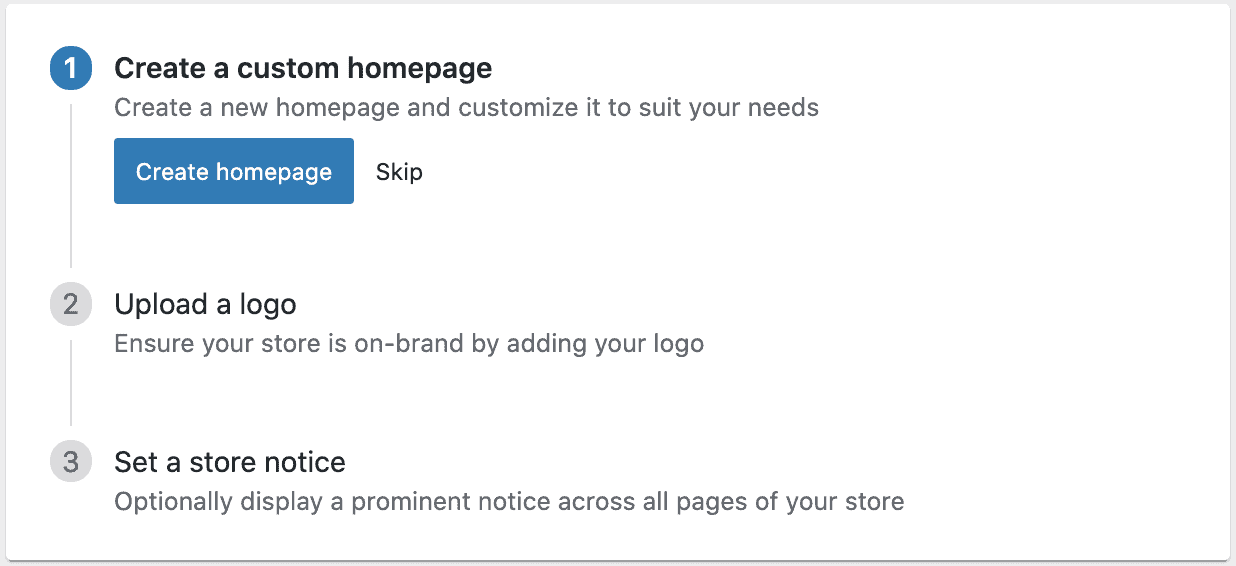
Personalize your WooCommerce store - Move on to Set up shipping. Here you can change the settings on how much customers pay to ship to your country and to the rest of the world.
- Then, Set up tax, either connect your store to WordPress for automated sale tax calculation or set up tax rates manually.
- Finally, Set up payments. You will have the option to choose direct bank transfers, cash on delivery, PayPal, or Credit Cards (by Stripe.).
Step5: Adding and Managing Products
The process to embed WooCommerce products to your site is similar to uploading a new post to your WordPress blog. Follow the steps below to add a WooCommerce product to your WordPress eCommerce store.
Get started by clicking on Products, which is located under WooCommerce. From there, click on Add New.

Scroll down to the Product data section and choose the product type. Then, set additional information – price, stock and inventory, shipping, linked products, etc. Check the Virtual box if your products are non-physical goods and don’t need shipping, and check Downloadable for products such as software or files.

For every product you upload, you’ll need the following things:
- Product name – e.g. Cute Pale Grey Cement Plant Pot
- Price – e.g. $12.95
- Main product image – this should be a picture of the whole product, from the front
- Additional product images (optional, but recommended) – include pictures from as many different angles as possible, and add closeups of finer details
- Product description (long) – e.g. ‘Inject some Scandinavian cool into your home with this simple cement planter. Features a drainage hole and comes with small matching dish, so your plant won’t get over-watered. Height: 15cm. Diameter: 8cm.’
- Short product description – e.g. ‘Simple cement planter with drainage hole and matching tray.’
- Product category (if you have more than one) – e.g. Plant Pots
- Product tags give you the option to label your products, making it easier for customers to find them.
- The Product image area allows you to upload or assign an image to your product.
- Product Gallery is where you can add more images to your product.
Once you’re happy with the settings, check the Preview, Save Draft, or click Publish. Here you can also choose the visibility of your product. The default is public, while other options are password protected and private. Note the Catalog visibility option which has the following settings:
- Shop and search results. Your products will be visible everywhere: search results, category, and shop pages.
- Shop only or Search results only. The products will show up either only on shop and category pages or only on search results.
- Hidden. Products will be visible only on the single product page, and not on any other pages.
Here’s an example with a featured image: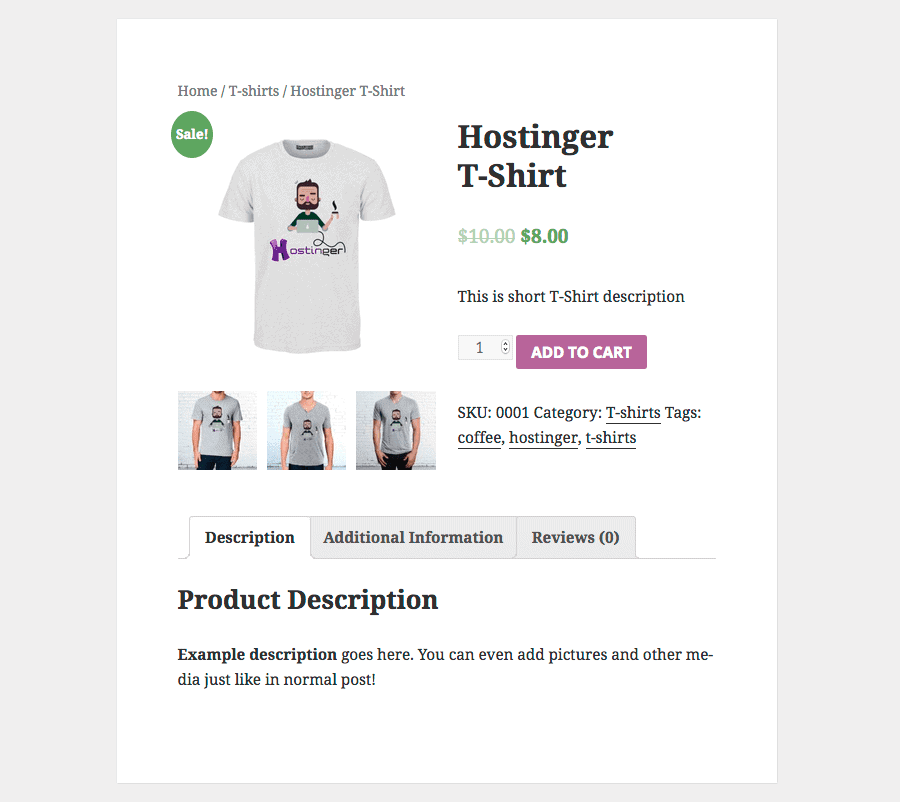
It is essential to learn the basics of WooCommerce and understand what product categories, attributes, and types are:
- Product category. This helps group your products. For example, if you sell apparel, top wear, bottom wear, and nightwear could be your product categories. They enable the shopper to locate products from the same category quickly. You can create as many categories as you want and edit them anytime.
- Attributes. This filters the products by size, color, fabric, and by what the customers like, to help them choose their desired products easily. You can either assign attributes independently to each product or set up a global attribute for the entire website.
- Product Types. WooCommerce saves the customer’s time by having predefined product types:
- Simple – a stand-alone product that is shipped without any other additional options. For example, one physical book.
- Grouped – you can group related items such as a dozen shot glasses.
- Virtual – these are products that require no shipping as they are not physical entities, like services.
- Downloadable – digital products that you can download. For example, songs, images, videos, eBooks, etc.
- External – products that are advertised on your website, but are sold elsewhere.
- Variable – these products have variable qualities like sizes, colors, etc. For example, shoes and clothes.
Managing Products
Let’s continue with this WooCommerce tutorial by checking the Products page. You can see and manage all of your products as well as edit, preview, feature an item, and apply bulk actions by selecting multiple products.
Here’s what else you can do with your products:
- Duplicating a product. Find the Duplicate button under each item. WooCommerce will create and open a new product draft for you to edit. It’s super useful if you have similar items to sell.
- Marking a product as featured. Click on the Star icon of the products of your choice. Featured items can be displayed on your homepage or be included in posts by using shortcodes.making a product featured on woocommerce.

- Deleting a product. Click on the Trash button that appears under the product name when you hover over it.
Step6: Managing WooCommerce
Now that you understand how to manage products on WooCommerce, in this part of the tutorial, you will learn how to handle everything else – orders, coupons, reports, and other online store settings.
Managing Orders
A new order is created every time your customer completes the checkout process. View them by clicking on WooCommerce -> Orders on the left-hand menu.
Each order has its unique Order ID, date of purchase, order status, and total price.
To edit or view a single order, click on the Order name. You can easily update the order status, modify the ordered items, issue refunds, as well as view and change pricing, taxes, shipping, billing, email address, and more.

Managing Coupons
Coupons are a great way to market and sell your products. With WooCommerce, you can add, edit, and view coupons in the Coupons section.
Creating a new coupon is similar to creating a new post or product. First, choose a name or generate a coupon code. Then decide on the discount type which can be fixed or a percentage. You can choose free shipping as well. Then select the expiry date and click Publish.
If you need to edit a coupon, simply click on its name, and make the necessary changes.

Customers
In the Customers section, view all your previous customer’s information. This includes:
- Name
- Username
- Last Active
- Sign-up date
- Email address
- How many orders
- Total money spent
- Country/Region
You can also download this information into a PDF file.
Analytics
In the Analytics section, you can see your store’s performance from the number of items purchased, gross sales, average daily sales, and product data, to other relevant stats.
You can get started generating statistics for separate products, categories, or coupons in this section. Do this by selecting the period for which you would like to create the report – the previous month, the current month, the previous seven days, or any custom duration, and click Go to generate the report.
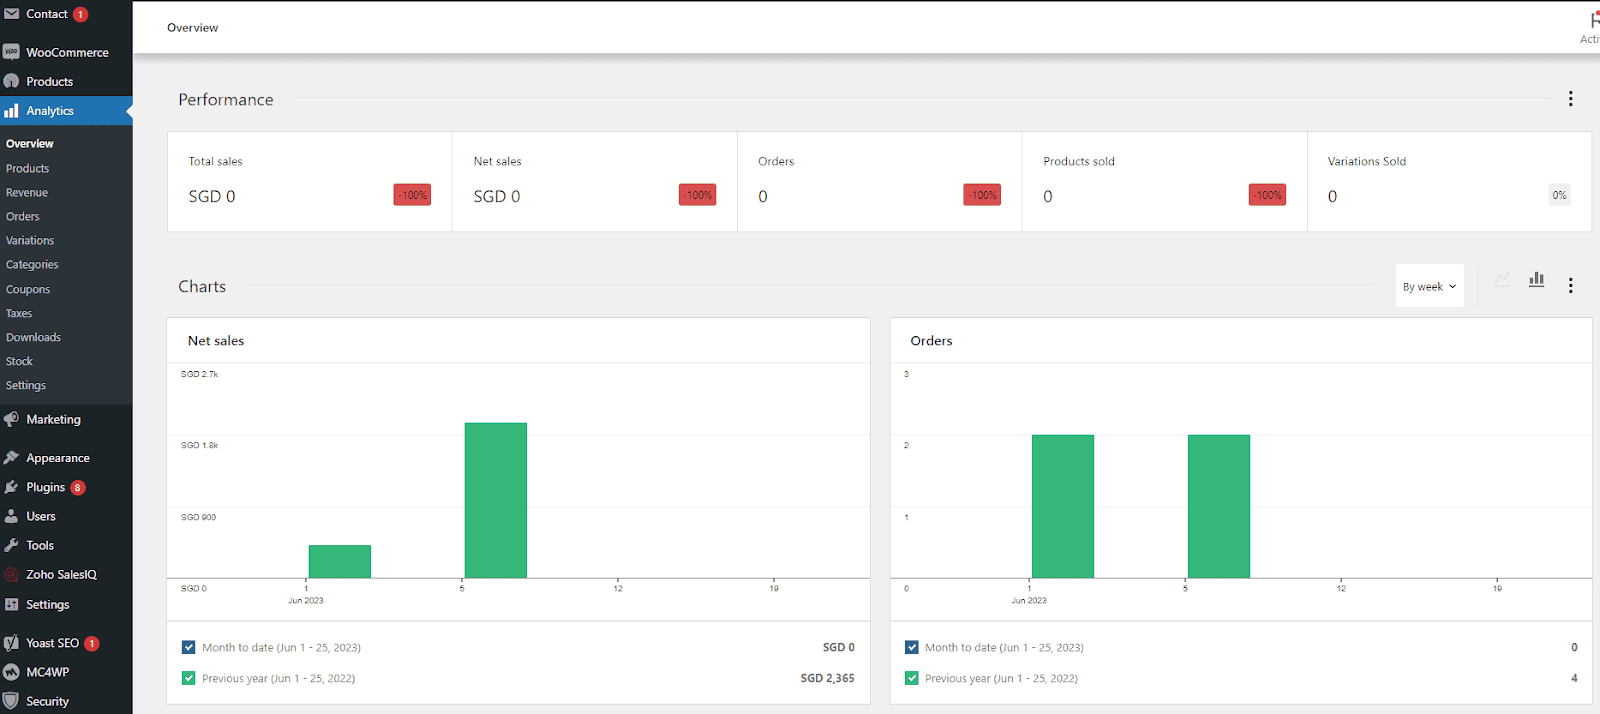
Settings
On the Settings page, you can change your online store’s core options, such as location, currency, or API settings. But be sure to hover on the question mark beside each of the settings for a short description before making any significant changes. Now let’s go through the available tabs and briefly overview what can be changed there.
- General. On this tab, you can change the store’s main settings such as location, currency, payment gateways, as well as enable/disable taxes, display notices for all your visitors, offer free shipping, and so on.
- Products. There are various product settings from different sections that you can customize:
- General – set the measurement units, enable/disable reviews, and set the base page of your shop.
- Inventory – customize the default stock options, enable/disable stock management, enable email notifications, etc.
- Downloadable Products – configure file download methods and access restrictions if you sell downloadables.
- Tax. Here, you can choose to include or exclude taxes when you enter the price, enable the automatic tax management, include or exclude tax in the pricing display, etc. You can also set new locations to follow a certain set of rates – standard rates, reduced rates, and zero rates.
- Shipping. You can add settings for shipping zones, shipping methods, free shipping, rates, and other shipping options. You can even set a different shipping rate for separate locations.
- Payments. On this tab, feel free to enable, disable, and manage all the available payment gateways.
- Accounts & Privacy. Select this tab to change the account settings for your customers, such as allowing guests to checkout without an account, letting them create an account during checkout, etc. You can also set a policy message to appear during account registration and set how long you want to keep customers’ data.
- Emails. It allows you to configure the settings for emails you send to buyers. You can also customize email templates and change email details.
- Integration. Here, you’ll get to integrate your store with Facebook and benefit from its features such as Messenger integration, showing your Facebook ads to potential buyers, install tracking pixel, etc.
- Advanced. This tab allows you to edit the settings on set pages, force SSL on checkout pages, enable or disable WooCommerce API, authorize access to external apps, and set their permissions. Webhooks can be configured in this section as well.
System Status
In this part of the tutorial, we’ll discuss the System Status page and why it is useful for checking the overall health of your WooCommerce store. From the WooCommerce version, web server type to PHP limits – you can see almost everything here.
Get started by pressing the Get System Report button to generate a detailed report for your hosting or WooCommerce WordPress support team.
You can also move to the following tabs to set other options:
- System status. This is an overview of everything from your API package, server environment, database, security, plugins, settings, pages, status, and more.
- Tools. In this section, you can clear WooCommerce cache, enable/disable debugging, reset user capabilities, and so on.
- Logs. This tab retrieves log files with useful information for debugging or troubleshooting errors.
- Scheduled Actions. This contains a list of hooks (automatic actions) along with other details such as the scheduled date, status (completed or pending), recurrence time, and logs.
Extensions
Extensions are what make WooCommerce so flexible and easily adaptable. Similar to WordPress plugins, you can install these WooCommerce features from the WooCommerce Extension store.
Although there are mostly premium extensions, they are worth every penny. You can enhance your online store, add more payment gateways, shipping methods, integrate tracking solutions, and synchronize WooCommerce with third-party services.
Keep on reading to find our list of recommended extensions and plugins at the end of this WooCommerce tutorial.
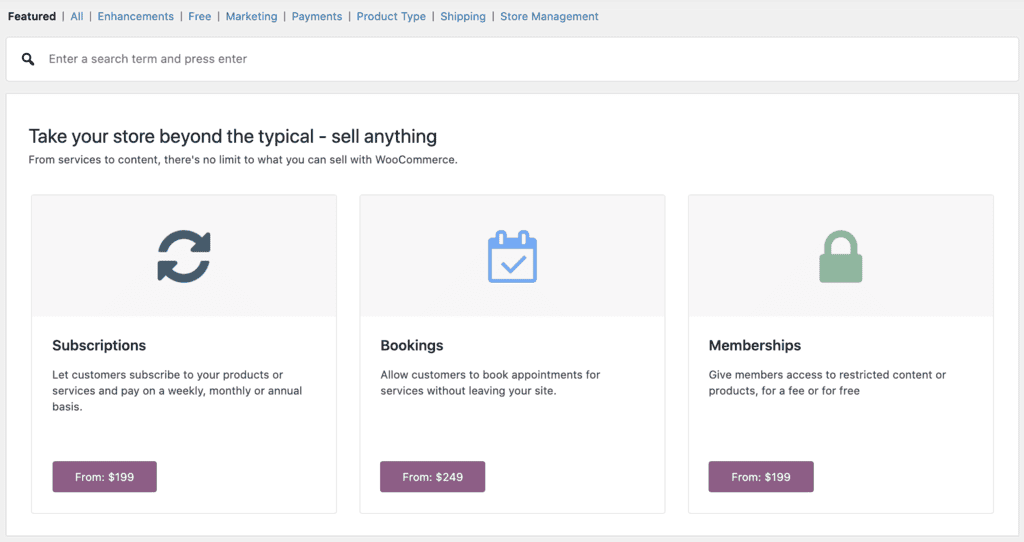
There are also WooCommerce plugins specifically designed for easier store management, make sure to check them out.
Customizing Your Store
In most cases, it isn’t the best idea to display your WordPress WooCommerce store in the default look. Take advantage of the vast array of customization options available and tailor your website to your needs. Therefore, to attain the maximum interest of customers, we recommend going for a custom theme.
You can improve the user experience even further by changing your website settings and installing WooCommerce extensions. Fortunately, a lot of WooCommerce features, themes, and extensions are free, plus you can find them on the WooCommerce homepage. Let’s look at some of them more closely:
Step7: Choose a theme
Just like any other WordPress website, you can elevate your WooCommerce store by installing a new theme. There are plenty of options – whether you want a classy and minimalist look, or want to be loud and abstract.
Installing themes on WordPress is fairly straightforward – simply go to your admin area and navigate to Appearance -> Themes. Then, click the Add New button to install a new theme. If you are still having trouble, check our step-by-step guide on installing WordPress themes.
In this WooCommerce tutorial, we have compiled a list of the most popular eCommerce themes for your WooCommerce store:
Illdy

An excellent place to start is with, Illdy, a sleek, modern, and minimalistic WordPress theme. Although geared primarily towards portfolio sites, due to its single page design, it can also work well for a business website. It is also compatible with other popular plugins.
Storefront
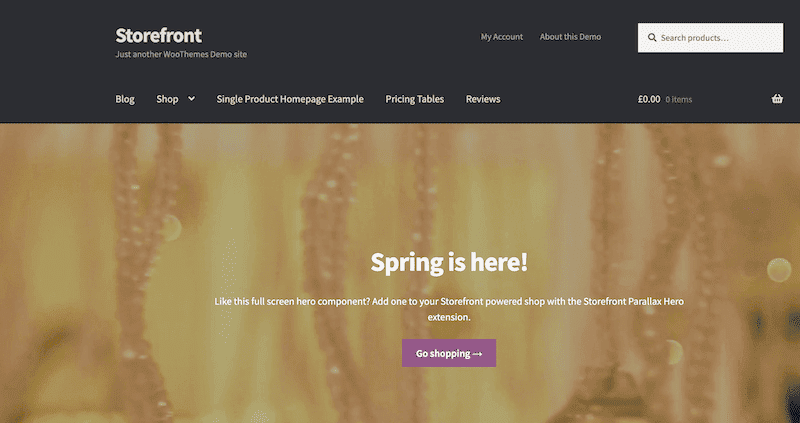
Developed by WooCommerce, Storefront is a collection of WordPress themes. It comes with child theme variations, each of which is designed for specific eCommerce websites.
For instance, the Galleria child theme is perfect for a clothing and fashion store, while the Bookshop theme is intended for an online book store. With more than ten child themes to choose from, each with its own unique flavor and features, you can hardly go wrong with Storefront.
Astra

Astra is a highly-customizable WordPress theme that suits any website’s purposes, including eCommerce. It’s a lightweight theme, meaning it has a fast loading time that is great for user experience and may benefit your business’ conversion rate.
This theme offers templates that can cater to various eCommerce niches. For example, the Fashion Designer template is a great option for fashion or luxury items. Its minimal website design and spacious white space help draw visitors’ attention to your product photos. It also comes with a testimonials section that can be excellent social proof for potential customers.
Step8: Installing Extensions
As stated before in this WooCommerce tutorial, extensions and plugins are some WooCommerce features that make the platform a powerful eCommerce tool. You can pile a ton of useful features on top of the WooCommerce core. It ranges from user experience enhancements, additional languages, currency options, dedicated analytics, and more.
To install plugins on WordPress, navigate to the admin panel to Plugins -> Add New. The following is a brief list of some of the most popular extensions and plugins for WooCommerce:
WooCommerce Currency Switcher

A must-have for eCommerce websites that operate on a global scale, the Currency Switcher for WooCommerce is perfect for converting currencies on-the-fly.
PayPal

Any eCommerce website is incomplete without an online payment solution. With PayPal, you get the world’s most widely used payment system on your WooCommerce website.
Stripe for WooCommerce

An alternative to PayPal is the Stripe Payment Gateway for WooCommerce. This can be a better option for some, as it does not take the customer to an external page for payment. Instead, it integrates fully with your website. It also supports Visa, MasterCard, Apple Pay, Goole Pay, American Express, and more.
WooCommerce Multilingual

A self-described glue for the WooCommerce and WPML (WordPress Multilingual) plugins, WooCommerce Multilingual allows you to translate every facet of your website to other languages. This includes product information, checkout, and contact.
WooCommerce Product Filter

As the name suggests, the plugin filters out products based on various criteria like price, size, category, etc. Product filtering is a staple of any eCommerce website, so you should definitely have this on your website.
WooCommerce Menu Cart

Another neat plugin for enhancing user experience, the WooCommerce Menu Cart displays the visitors’ shopping cart on every page in a tiny window. Customers don’t have to periodically check the cart manually as they can see which items are in the cart at all times.
YITH WooCommerce Wishlist

Combining social media with eCommerce is often a good idea, and YITH seems to understand this very well. Its WooCommerce Wishlist plugin can be used by visitors to create an item wish list on your eCommerce website, which can then be shared on various social media platforms for all their friends to see. A win-win for both sides.
Pushover

Keeping in touch with mobile design principles, Pushover for WooCommerce is a tiny yet highly useful plugin for enabling push notifications for your eCommerce business. Whether you want real-time notifications on inventory, sales, or anything else, Pushover will come in handy.
YITH Infinite Scrolling

Another gem of an extension by YITH, Infinite Scrolling, eliminates the wait users have to endure for a new page to load. Instead, they can scroll indefinitely for new items. This is useful for quick comparisons of multiple items, as you don’t have to switch between pages.
WooCommerce Gift Wrapper

To separate your WooCommerce website from other eCommerce stores, you can also change your settings and add the option for customers to gift wrap the items they have just bought. This makes sending gifts convenient and can be beneficial for your business come holiday season. The plugin can also be configured to choose between multiple gift wraps.
Why Choose WooCommerce?
Among the many eCommerce plugins you can use for free, WooCommerce in WordPress is considered to be at the top of the list. Here’s why:
- Built for WordPress. It allows seamless integration with WordPress, and you can also connect with millions of WordPress users.
- Scalable with your needs. Small or large, few or many, WooCommerce can ride the wave with you.
- Ensure security. WooCommerce protects your data from falling into the hands of any third-party platform. It also secures the transactions between consumers and you.
- Audited by Sucuri. This ensures that WooCommerce sticks to the coding standards and best practices of WordPress.
- A vast and ever-growing global community. There are more than 350 contributors and over 5 million WooCommerce installations up to this date.
- Well-documented. WooCommerce provides comprehensive documentation and guides that cover a broad range of topics like setup, SSL, theming, snippets, and so on.
- An array of free and paid extensions. The most defining benefit of WooCommerce is a large number of free and paid extensions. They allow you to customize your WooCommerce website with a wide range of features and integrations.
Conclusion
WooCommerce is undoubtedly a great tool to turn WordPress into a fully-featured eCommerce online store.
The best part of it is that you don’t need in-depth knowledge of programming to sell your products online. We hope that this WooCommerce tutorial helps you set up and manage your online store.
If you have any queries related to the above WooCommerce tutorial, do let us know in the comments. Make sure to check out our in-depth WordPress tutorial to scale your site even further.
Frequently Asked Questions About How to Use WooCommerce
What Is WooCommerce Used For?
WooCommerce is an open source Ecommerce platform that is used by over three million online shops.
WooCommerce allows you to create an online store and start selling products without the need to make costly investments in other software or IT staff. It is designed for simplicity, with the core focus on helping you sell your products.
Other than that, WooCommerce has its own shopping cart system, and it supports payment gateways like Stripe, PayPal, and Square. It can also handle various currencies, so it’s possible to expand your business internationally.
Is WooCommerce Easy to Set Up?
Yes, it is. After installing and activating the WooCommerce plugin, WordPress will automatically launch the WooCommerce Setup Wizard. Simply follow the steps to set up your online store, which will only take a few minutes.
Once the basic settings are saved, you’re free to start adding products and launch your WooCommerce store.
Can WooCommerce Handle 5,000 Products?
WooCommerce has a scalable framework and supports high traffic – there’s no limit to how many products it can handle.
Ultimately, whether your WooCommerce store can handle 5,000 products or transactions depends on the web hosting and how optimized the website is.
Make sure your hosting plan has enough storage and bandwidth, is scalable, and can serve high traffic.
How Can I Use WooCommerce for Free?
The WooCommerce plugin is open-source and completely free to use. However, you need a plan from a WordPress host since WooCommerce is not a stand-alone platform.
Depending on your needs, you might need to install premium extensions and plugins which can also increase your overall WooCommerce costs.
How Can I Make WooCommerce Perform Faster?
There are several ways to increase the speed of your WooCommerce store:
- Choose a better hosting service – your online store is expected to grow and scale in time. If your current hosting plan is running out of resources because of that, it may affect the performance of the site. Hence, an upgrade might be necessary.
- Compress product images – an online store is full of product images and banners. Compress or reduce their file size to prevent the website from slowing down. There are plugins like Smush and ShortPixel that can automatically compress images.
- Use cache plugins – caching can reduce the amount of data sent between your site’s server, database, and the visitor’s browser, speeding the website’s loading time. W3 Total Cache and WP Fastest Cache are compatible with WooCommerce.
- Increase WordPress memory limit – by default, the WordPress PHP memory limit is set to 32 MB. Contact your hosting provider to increase it. Or, adjust it yourself by configuring the functions.php, PHP.ini, or the .htaccess file.
- Clean up WooCommerce database – optimize your online store’s database by deleting the page, post, and product revisions stored in it. There may also be expired transients that need cleaning up. Plugins that can help are the WP-Optimize and Delete Expired Transients.
- Disable AJAX Cart Fragments – the feature automatically updates a customer’s shopping cart total without them having to refresh the page. However, it tends to interrupt the caching process. Use the Disable Cart Fragments plugin to turn the feature off.
Share:

